
Whether you are packing your own lunch before heading to work or packing your kids’ lunches before sending them off to school, there’s a lot more to assembling a satisfying mid-day meal than tossing a peanut butter and jelly sandwich in a paper bag. Sure, sticking to the basics is easy, but it gets boring pretty fast — for kids and adults alike. Packing appetizing and healthy lunches may require a little more time, but with things like airtight food storage containers, it’s possible to pack up all sorts of tastebud-tantalizing meals for you or your family.
If you're ready to step up your lunch-packing game, you’re in the right place. Keep reading to discover a wide range of packed lunch ideas, storage tips, recipes and more!
A Word on Storage and Food Safety
Before you start filling your lunchbox, knowing how to do it safely is crucial. No one wants to deal with an upset stomach or, worse, contract a serious foodborne illness. Keeping food at the appropriate temperature is essential, but you also need to consider whether the food itself is safe. First, let’s talk about temperature.
Temperatures ranging from 40 to 140 °F are known as the “Danger Zone” when it comes to food storage. That’s because harmful bacteria multiply quickly between those temperatures. If the temperature of perishable food reaches the danger zone, it does not take long for it to become unsafe to eat.
Refrigerated foods, like poultry, meat, eggs, cheese and fruit, must be kept cold at all times. At temperatures of 90° or higher, the bacterial load reaches unsafe levels in less than an hour. Even if the temperature is lower, though, it shouldn’t be left out for more than two hours.

We recommend packing your lunch the evening before and keeping it in the refrigerator until morning. This ensures that everything will stay cool as long as possible. Placing ice packs around the food is also important. For extra temperature control, consider freezing juice or bottled water (as long as it will thaw out before lunchtime).
Keeping hot food hot is important too. If you would like to pack soup, stew or another hot meal, put it in an insulated thermos as soon as it’s ready. Don’t wait for it to cool. Also, consider preheating the thermos by filling it with boiling water and leaving it to sit for a bit until you’re ready to pour it out and put your food inside. Never pack hot and cold food in the same container.
Last, take care to avoid cross-contamination. Wash your hands before preparing lunch and after touching different types of food. Wash cutting boards, countertops, dishes and utensils with hot water before you start and again after preparing each item or ingredient. The less bacteria on your food when you pack it, the less you have to worry about it multiplying throughout the day.
Make Lunchtime Environmentally Friendly
Packing lunch every day can have a huge environmental impact when you use single-use plastics, foil, paper towels, etc. To reduce your impact, consider switching to reusable containers instead of using disposables. Making the switch can save you from lunchtime disasters like spilled food too.
Our reusable silicone bags are an exceptional alternative to traditional plastic baggies. They come in a variety of sizes, so you’re covered whether you’re packing a sandwich, snacks or just about anything else. Made from 100% LFGB-certified silicone, they contain no glues, adhesives or chemicals. They come in stylish colors, too, to transform your lunch from drab to delightful. After each use, simply flip the bag inside-out and wash. You can even toss these durable bags in the dishwasher. They’re microwave-safe, too!
Check Out Our Eco-Friendly Food Storage Containers
Switching from disposable condiment containers to reusable salad dressing containers is also an eco-friendly move. Don’t let the name fool you! You can use these sleek containers for salad dressing, hummus, salt, dip and just about anything else you can think of. With these containers, you can take your favorite condiments with you on the go without worrying about leaks or the impact your lunch has on the planet. Made from BPA-free plastic with silicone lids, these simple-yet-stylish containers are both microwave and dishwasher safe.
Consider ditching bottled water and investing in some high-quality insulated drinkware. Doing so cuts down on your use of single-use plastics. You can also use our insulated water bottles to transport both hot and cold beverages and even food. Featuring a double-walled, vacuum-sealed stainless steel core with a ceramic coating, insulated bottles from W&P keep drinks cold for 24 hours and hot for 12 hours. Whether you fill it up with ice-cold water or piping-hot soup, you won’t have to worry about any unpleasant surprises. They come in multiple sizes and colors, and their leakproof design prevents messes too.

How to Pack Effectively to Maximize Lunchbox Space
Packing up a healthy, nutritionally balanced lunch that will provide the fuel you or your child needs to power through the afternoon can be tricky. Lunchboxes — especially those designed for kids — are often small, making it difficult to fit food, a drink and ice packs. The solution? Learn how to pack lunches more effectively to maximize space.
Invest in containers that will fit neatly in a lunchbox. Airtight containers in a variety of sizes allow you to pack just about anything you can think of and, when arranged carefully, several will fit in one lunchbox. You could also check out our Porter Lunch Box. These bento-inspired boxes are sleek and sophisticated, and they make it easy to keep all of your lunch components separate. Each one has three compartments and enough room for salads, sandwiches and more. The Porter Lunch Box is made from BPA-free plastic and is both microwave and dishwasher-safe.
Instead of rushing to fill lunch boxes every morning, pack them the night before. In addition to helping your food stay cool until lunchtime, packing in advance gives you time to arrange everything neatly rather than tossing it in as quickly as possible during your hectic morning.
Recipes to Make the Best Lunches Ever
With all of that out of the way, let’s get to the fun part: recipes! If you are tired of the traditional sandwich and chips, these recipes are sure to please. And, of course, you can customize them to meet your dietary needs or suit your taste.
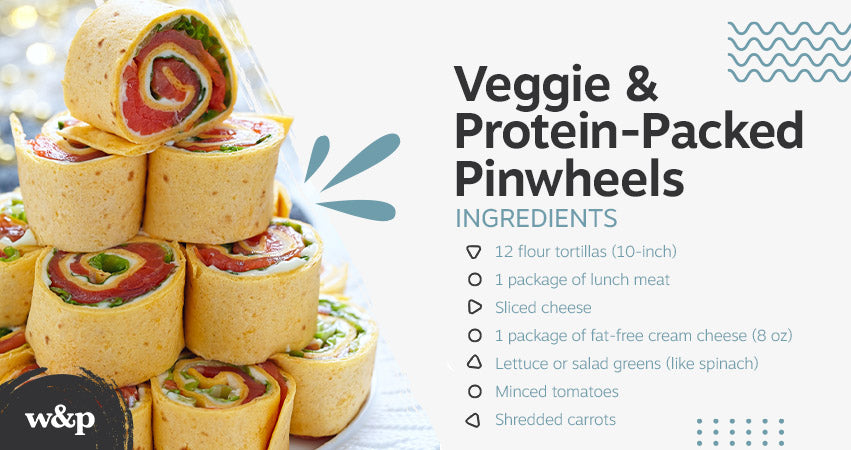
1. Veggie and Protein-Packed Pinwheels
Ingredients:
- 12 flour tortillas (10-inch)
- 1 package of sliced ham or turkey (or your favorite lunch meat)
- Sliced cheese
- 1 package of fat-free cream cheese (8 oz)
- Lettuce or salad greens (like spinach)
- Minced tomatoes
- Shredded carrots
Start by spreading the cream cheese over each tortilla. Then top with lettuce or greens. Arrange the lunch meat and cheese in a single layer over the greens, and then cover with the carrots and tomatoes. Roll into tight wraps and slice diagonally to create bite-size pinwheels. Pair these pinwheels with chips or fresh-cut fruit for a delicious lunch that isn’t difficult to make or pack. When you’re finished, you’ll have enough to feed the entire family or fill multiple days’ worth of lunches.
2. Peanut Butter and Jelly Apple “Sandwiches”
Ingredients:
- 2 apples
- Lemon juice
- ¼ cup jelly
- ¼ cup peanut butter
Slice both of the apples into rounds that are roughly ¼" in thickness, and then use a small cookie cutter to remove the core from each slice. Using fun shapes, like stars, hearts or flowers, is a great way to make this lunch more appealing to kids. Add the slices to a bowl of lemon juice, and toss to coat. Pineapple juice works too. This step prevents the apple slices from turning brown before lunchtime.
Remove the apples from the juice, and then spread peanut butter on one-fourth of the slices with peanut butter and jelly on another fourth. Use the other half of your slices to make sandwiches using the peanut butter and jelly slices. Put them in an airtight container immediately.
Bonus tip: If you or your kids don’t like the taste of lemon or pineapple, you can still keep the slices fresh by using a product known as Fruit-Fresh. Made from citric acid, this natural preservative is a staple when canning vegetables and fruits. It also works to keep fruit fresh longer. Just sprinkle it on the apple slices before putting them in a container.

3. Homemade Bistro Box
Ingredients:
- ⅓ cup carrots
- ¼ cup almonds
- 1 cup grapes
- ¼ cup sliced pickles
- 1 whole wheat tortilla
- 1 tablespoon mustard
- 1 slice cheddar cheese
- 1 slice deli ham or turkey
- ½ cup spinach
Spread mustard on the tortilla, and then top with spinach, cheese and ham/turkey. Roll into a wrap, and then slice into rounds. Place in a divided container along with the almonds, grapes, carrots and pickles.
Why pick up a premade bistro box from Starbucks or your local store when you can make your own for a fraction of the cost? Plus, you can easily customize this recipe to include all of your (or your child’s) favorite ingredients. Toss in some walnuts for an extra protein boost or add a few chocolate chips to satisfy your child’s sweet tooth. You could even include a hardboiled egg. The options are pretty much endless. And for the cost of a single premade box, you can likely make several homemade ones.
4. Banana, Peanut Butter and Granola Wrap
Ingredients:
- 1 large whole wheat tortilla
- 1 banana, peeled and sliced
- 2 tablespoons smooth peanut butter
- 1 teaspoon honey
- 2 tablespoons granola
Start by covering the tortilla with peanut butter, leaving a 1-inch border all the way around. Arrange the banana slices on the peanut butter in a single layer, and then sprinkle granola and drizzle honey over the top. Roll into a wrap.
Cut in half on an angle and place one or both halves in a container or reusable bag. This lunchtime treat is packed with protein, and it’s a favorite among kids. If you’d like to take it up a notch and add even more protein, sprinkle some walnuts on the peanut butter and banana along with the granola.
Shop All of Our Drinkware to Complete Your Lunch

5. Ham and Cheese Lunch Muffins
Ingredients:
- 1 ½ cup flour
- ½ cup yellow cornmeal
- ½ teaspoon baking soda
- 2 teaspoons baking powder
- 1 teaspoon garlic powder
- ½ teaspoon salt
- 2 large eggs
- 1 ¼ cup buttermilk
- 8 ounces of thick-sliced deli ham, diced
- 1 cup shredded cheddar cheese
- 7 tablespoons unsalted butter, melted, cooled and divided
- 3 tablespoons chives, finely chopped and divided
- Freshly ground black pepper
Preheat your oven to 375°F and line a standard 12-cup muffin tin with paper liners or coat the tray with nonstick cooking spray. Whisk together the flour, cornmeal, baking soda, baking powder, garlic powder and salt in a large bowl. In a separate bowl, whisk the eggs, buttermilk and five tablespoons of butter together in a medium bowl until combined. Pour the wet ingredients into the dry, and mix using a rubber spatula until just combined. Don’t overmix. Some lumps are fine. Fold in 2 tablespoons of the chives, all of the cheese and all but ½ cup of the ham.
Carefully fill ¾ of each cup of the muffin tray with the batter. Once all the cups are full, top with remaining chives and ham, and then season with pepper and top each with ½ teaspoon of the remaining melted butter. Bake roughly 20 to 25 minutes until the tops begin to brown and a toothpick inserted in the middle of a muffin comes out clean. Let cool in the pan for about five minutes, and then transfer the muffins to a cooling rack. Once cool, store in an airtight container in the refrigerator for up to four days. You can also freeze them for up to three months. Toss one or two in your or your child’s lunchbox, and then enjoy them cold or reheat at lunchtime.
Closing Thoughts
Packing lunch is a good way to save money and eat healthily. But after a while, the same old sandwiches get old. Try the suggestions and recipes above to take your lunchbox game to the next level!
Image Credits
Elena Shashkina/Shutterstock.com
nelea33/Shutterstock.com
envastudio/Shutterstock.com